useJourney, a React hook for building user journeys
The problem
Over the years, I've built several different user journeys as part of my work, and as they grow, they always become harder and harder to maintain. Logic between steps starts getting convoluted, and you need to track what step should come next and all the different variables you depend on. It becomes a mess.
I've thought a lot about this and started looking at state machines to deal with it. Libraries like XState seemed appealing but ultimately seemed too divorced from my problem to fit into it (if you disagree, I'd love to hear your opinion!).
What do we need?
At their core, all journeys have the same need for answers. Based on your state:
- What's the next step?
- Should we even show a next button?
- Which steps are complete?
- Which parts of the journey are available to the user given the answers they've given so far?
- Is this the last step of the journey?
- And so on.
How can you build all this logic into your system in a way that is maintainable, easy to extend, and easy to reason about?
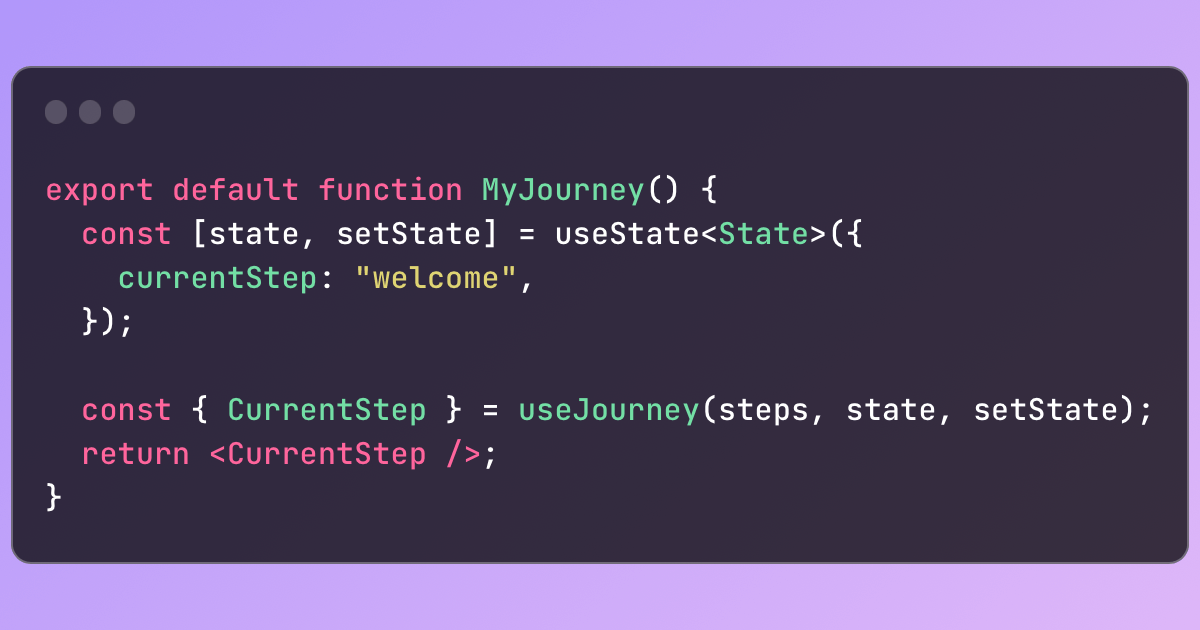
What if it was as simple as:
export default function MyJourney() {
    const { CurrentStep } = useJourney(steps, state);
    return <CurrentStep />;
}
How it works
There are two key things you give useJourney: State and Steps. State is easy; it's all the variables that define your journey's current state, including the step the user is currently on. The Steps parameter is where the magic happens; it contains all the information for each step, including any necessary logic.
With that, each step can decide on its own situation, whether it's skipped or complete, whether the user should be allowed to proceed from it, etc. Logic becomes easy to maintain, as each step has full access to the entire state object and the results of decisions by other steps (e.g., mark this step as skipped if Step X is also skipped). It also becomes easy to keep everything organized, as each step (and its component) can be kept in separate files.
The example below shows off a complete journey, including a step that gets skipped based on the user's answer to a previous question.
You define a journey as a map of steps (you can use getStepsMap to infer types in TypeScript, which will give you autocomplete in your IDE for all of a step's possible properties), each of which has a slug, metadata, and any logic that you need to run to determine if the step is complete or skipped.
The metadata is just a container for any data you want to pass to the step's component, and all logic is just functions that take the state and use it to make decisions.
How to use it
Each step in a journey should be in a different file, so it's straightforward to create huge complex journeys and keep them all neatly organized. In this example, we will define all the steps in the same file to keep it simple.
You can get more documentation at pocketarc.github.io/use-journey.
// First, define the steps.
const steps = getStepsMap([
    {
        slug: "start",
        component: StepStart
    },
    {
        slug: "is-new",
        component: StepIsNew,
        isComplete: (state: State) => {
            return state.isNew !== undefined;
        }
    },
    {
        slug: "full-name",
        component: StepFullName,
        isComplete: (state: State) => {
            return state.fullName !== "";
        },
        isSkipped: (state: State) => {
            return state.isNew !== true;
        }
    },
    {
        slug: "finish",
        component: StepFinish
    }
]);

// Then, use the journey.
export default function SimpleJourney() {
    const [state, setState] = useState<State>({
        currentStep: "start",
        isNew: undefined,
        fullName: undefined
    });
    const { CurrentStep, showPreviousButton, showNextButton, goToNextStep, goToPreviousStep, slug } = useJourney(steps, state, setState);

    return (
        <>
            <h1>You are on {slug}</h1>
            <CurrentStep />
            {showPreviousButton && (
                <button onClick={goToPreviousStep} disabled={!showPreviousButton}>
                    Previous
                </button>
            )}
            {showNextButton && (
                <button onClick={goToNextStep} disabled={!showNextButton}>
                    Next
                </button>
            )}
        </>
    );
}
Getting started
Pretty standard, use npm (or yarn, or pnpm) to install use-journey.
npm install @pocketarc/use-journey
Check it out on GitHub, and read the documentation.
Final words
If there's anything you need, don't be afraid to ask! This package is still in an early stage of development, and I'm looking for an outside perspective from others trying to build their own journeys, so feel free to raise issues as needed. PRs are welcome, as well.